Creating a photo gallery is a great way to showcase your students, customers, or community. The netStartEnterprise Photo Gallery module provides a set of easy-to-use tools to allow you to create a very nice gallery for your images.
Creating a Photo Gallery
- First we will create a Photo Gallery web Page by clicking on "Add web Pages" and selecting the Photo Gallery template.
- Select the web page name to begin editing your Photo Gallery
Adding Photos
- Navigate to the “Photo Gallery Content Zone” to bring up the Photo Gallery setup.
- Select the ImageMgr button to setup your folder and upload your photos.
- Each Photo Gallery you create will need its own unique folder – we highly recommend that you name your folder the same name as your Photo Gallery web page. This will come in handy if you have more than one Photo Gallery.
- Navigate to your "new folder" then click "upload" to upload your photos. You can upload multiple photos at the same time. Click the "Add" button to add more upload options. Also at any time you can add or remove photos from your Photo Gallery.
- Once you have all of the photos you want to be included in your gallery, double click on one of them and you will return to your Photo Gallery setup.
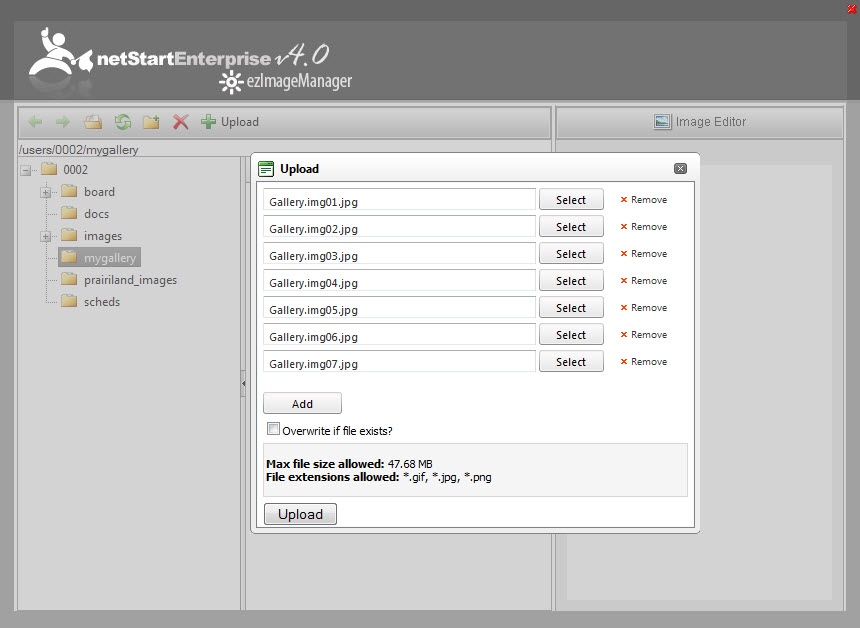
Photo Gallery Features
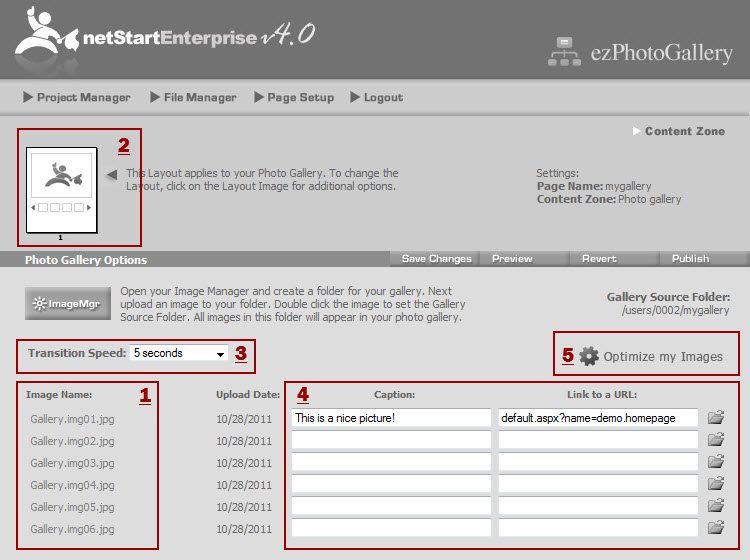
- Notice that your photos now appear in the Photo Gallery and that the Gallery Source Folder is pointing to your new folder.
- You can change the layout of your Photo Gallery by simply clicking on one of the layout images.
- You can also set the transition speed that your gallery will auto-rotate
- You can add captions and hyperlinks to any one of the photos in your Photo Gallery
- Click the "Optimize my Images" button to compress your photos and optimize them for the web.

0 Comments