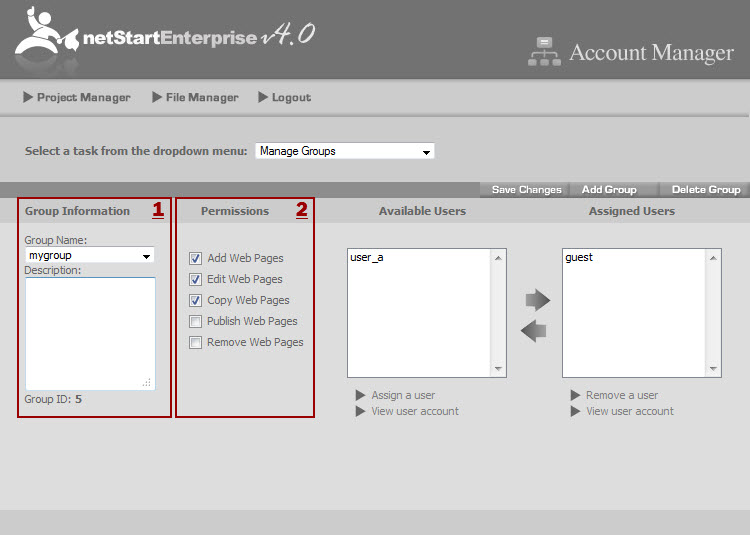
If your organization has numerous User Accounts you may find it useful to establish permissions to Web Pages by Groups rather than individual accounts. You must still create individual accounts but by assigning individuals to a group. You can grant permissions to everyone in the group using this Manage Groups function of the Account Manager.
Add Group
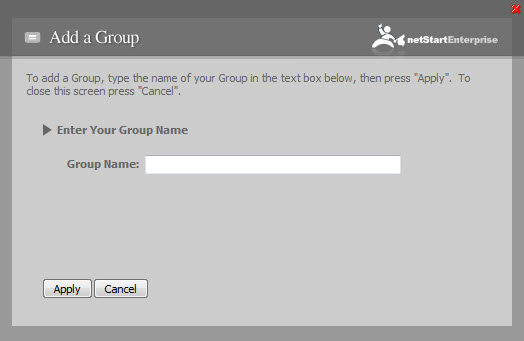
Select 'Manage Groups' from the drop-down menu of the Account Manager. Then select 'Add Group' from the Account Manager options. A small pop-up window (Add a Group to Your Web Project) will appear. Type the name of your new Group in the text box and click 'Apply' to create the group or 'Cancel' to exit without creating a group.
1. Add Description
Once the Group has been created it becomes the active group and you can add a description of the Group that further illustrates how the Group is defined.
2. Permissions
Assign permissions for the Group. These permissions define if a group can add, edit, publish, or remove Web Pages. Simply check the appropriate box to grant that permission to the new group. Group permission will always override individual permissions. If you have an individual with add and edit permissions who is added to a group with all permissions the individual now has all the permissions of the group. However, if there is a need to have a user that has different permissions than the rest of the Group, such as the permission to Publish, for example, you can create a Power User account and add it to the Group. The Power User can have different permissions than the rest of the Group.

0 Comments